Upgrade Your Doors: How to Install 4-Inch Radius Corner Door Hinges
Doors are a fundamental aspect of any home. They not only provide privacy and security but also contribute significantly to the overall aesthetics of your living space. However, often overlooked are the hinges that hold these doors in place. Upgrading your door hinges can enhance both the functionality and appearance of your doors. In this guide, we will explore the benefits and step-by-step process of installing 4-inch radius corner door hinges.
Understanding 4-Inch Radius Corner Door Hinges

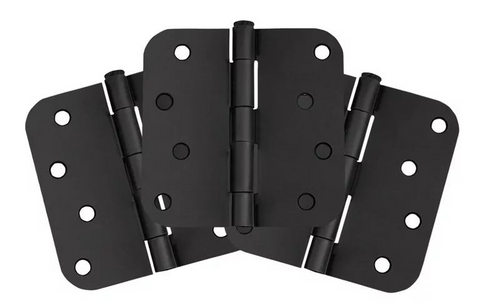
Before delving into the installation process, it's essential to understand what 4-inch radius corner door hinges are and why they are a popular choice for homeowners. These hinges feature a curved corner with a 4-inch radius, providing a sleek and modern look to your doors.
One of the primary benefits of 4-inch radius corner hinges is their ability to facilitate smooth door operation. The rounded corners reduce friction between the hinge and the door jamb, allowing for effortless swinging motion. Additionally, these hinges are designed to distribute weight evenly, resulting in reduced wear and tear on both the hinges and the door.
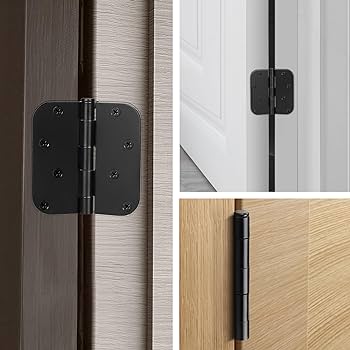
Furthermore, 4-inch radius corner hinges offer versatility in terms of design and finish options. Whether you prefer a classic brass finish or a modern matte black, you can find hinges that complement your door style and overall décor.
Benefits of Upgrading to 4-Inch Radius Corner Door Hinges

1. Improved Durability
One of the primary advantages of upgrading to 4-inch radius corner door hinges is enhanced durability. These hinges are typically constructed from high-quality materials such as stainless steel or solid brass, making them more resistant to wear and tear than standard hinges. As a result, they can withstand frequent use without succumbing to corrosion or damage, ensuring long-term reliability.
2. Smooth Operation
The larger radius of 4-inch corner hinges allows for smoother door movement. When compared to standard hinges with smaller radii, 4-inch radius corner hinges provide a broader range of motion, reducing friction and allowing the door to open and close with minimal effort. This smooth operation not only enhances convenience but also prolongs the life of the door by minimizing stress on the hinges and other components.
3. Enhanced Security
Security is a top priority for any homeowner, and upgrading to 4-inch radius corner door hinges can contribute to a more secure environment. These hinges are typically thicker and sturdier than standard hinges, providing added strength and stability to the door assembly. As a result, doors equipped with 4-inch radius corner hinges are more resistant to forced entry attempts, increasing the overall security of your home.
4. Aesthetic Appeal
In addition to their functional benefits, 4-inch radius corner door hinges can also enhance the aesthetic appeal of your doors. Their sleek and modern design adds a touch of sophistication to any interior, complementing various architectural styles and decor themes. Whether you prefer a classic, traditional look or a more contemporary vibe, these hinges can elevate the overall appearance of your doors and living space.
5. Compatibility with Modern Door Designs
As home design trends evolve, so do the preferences for door styles and configurations. Many modern door designs feature thicker, heavier doors that require robust hinges to support their weight and ensure proper operation. 4-inch radius corner door hinges are well-suited for these modern door designs, offering the strength and durability needed to accommodate heavier doors without sacrificing performance or aesthetics.
6. Easy Installation
Despite their advanced features, installing 4-inch radius corner door hinges is a straightforward process that doesn't require specialized skills or tools. With basic household tools and a little patience, you can easily replace your existing hinges with the new ones. Most manufacturers provide detailed installation instructions to guide you through the process, ensuring a hassle-free upgrade.
Installation Guide

Now that we've covered the benefits, let's walk through the step-by-step process of installing 4-inch radius corner door hinges:
Step 1: Gather Your Tools and Materials
Before you begin the installation process, make sure you have all the necessary tools and materials:
Screwdriver (Phillips or flathead, depending on the screw type)
New 4-inch radius corner door hinges
Screws (typically included with the hinges)
Pencil
Tape measure
Chisel (if needed for mortising the hinges)
Step 2: Prepare the Door and Frame
Remove the Existing Hinges: Using your screwdriver, carefully unscrew and remove the existing door hinges from both the door and the door frame. If the old hinges are recessed (mortised) into the door and frame, use a chisel to carefully remove any wood or debris around the hinge recess.
Clean and Smooth Surfaces: Ensure that both the door and the door frame are clean and free of any debris or obstructions that could interfere with the installation of the new hinges. Use sandpaper to smooth out any rough areas if necessary.
Step 3: Mark the Hinge Locations
Measure and Mark: Using a tape measure and pencil, carefully measure and mark the locations for the new hinges on both the door and the door frame. The hinges should be positioned at equal distances from the top and bottom of the door and frame for proper alignment.
Mark the Hinge Depth: If the new hinges are larger or smaller than the old ones, you may need to adjust the depth of the hinge recess (mortise) accordingly. Use a pencil to mark the depth of the hinge mortise on both the door and the door frame.
Step 4: Install the New Hinges
Position the Hinges: Place the new 4-inch radius corner door hinges on the marked locations, aligning them with the pencil marks on both the door and the door frame. Make sure the hinges are oriented correctly, with the pin side facing the edge of the door.
Secure the Hinges: Using the screws provided with the hinges, attach them to both the door and the door frame. Start by securing one screw in each hinge to hold them in place, then proceed to install the remaining screws. Ensure that the screws are tightened securely to prevent any movement or instability.
Step 5: Test the Door
Check Alignment: Once the hinges are installed, check the alignment of the door to ensure that it swings freely and closes properly. If the door does not close smoothly or appears misaligned, you may need to adjust the hinge placement or tighten the screws further.
Test Operation: Open and close the door several times to test its operation and ensure that it moves smoothly without any binding or resistance. If the door sticks or does not close properly, make any necessary adjustments to the hinges or door alignment.
Step 6: Final Adjustments and Finishing Touches
Make Adjustments: If needed, make any final adjustments to the hinge placement, door alignment, or hinge tension to achieve optimal performance. This may involve loosening or tightening the screws slightly or adjusting the hinge position.
Check Security and Stability: Verify that the door is securely attached to the frame and that the hinges provide adequate support and stability. Ensure that there are no loose screws or other issues that could compromise the security of the door.
Finish: Once everything is properly installed and adjusted, you can finish the installation by touching up any paint or finish around the hinges if necessary. This will ensure a seamless appearance and enhance the overall aesthetics of the door.
Conclusion
Upgrading to 4-inch radius corner door hinges is a simple yet effective way to enhance the functionality and appearance of your doors. With their smooth operation, durability, and aesthetic appeal, these hinges offer numerous benefits for homeowners. By following the installation guide outlined above, you can easily upgrade your doors and enjoy the many advantages that 4-inch radius corner hinges have to offer.
