

Handy Tips: How to Easily Install Your Bathroom Door Hinges
Installing bathroom door hinges might seem like a daunting task, especially for those who are not familiar with DIY projects. However, with the right tools and techniques, you can easily install door hinges and give your bathroom a fresh new look. In this guide, we'll walk you through the process step by step, offering handy tips to ensure a smooth installation.
Understanding Door Hinges
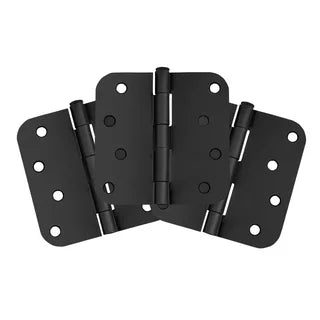
Before diving into the installation process, it's essential to understand the different types of door hinges available. The most common types used for bathroom doors are butt hinges and pivot hinges. Butt hinges are more traditional and require mortising, while pivot hinges offer a sleek, modern look without the need for mortising.
Tools and Materials Needed

Let's expand on the tools and materials needed for installing bathroom door hinges:
Screwdriver: An electric screwdriver is preferable as it makes the installation process faster and more efficient. However, a manual screwdriver will also suffice.
Hammer: A hammer may be needed to tap the hinges into place or to gently adjust the alignment of the door if necessary.
Chisel: If you're installing butt hinges that require mortising, a chisel is essential for cutting out the recesses in the door and frame to accommodate the hinges.
Measuring Tape: Accurate measurements are crucial for ensuring the hinges are installed at the correct locations and distances from the edges of the door and frame.
Pencil: A pencil is used for marking the locations where the hinges will be installed on both the door and frame.
Hinges: Depending on your preference and the style of your door, choose either butt hinges or pivot hinges. Butt hinges are more traditional and require mortising, while pivot hinges offer a sleeker, modern look without the need for mortising.
Screws: Be sure to use screws that are appropriate in size and material for attaching the hinges to both the door and frame securely.
Drill (Optional): If you prefer, you can use a drill to create pilot holes for the screws, which can make installation easier and prevent wood from splitting.
Screwdriver Bit Set: If you're using an electric screwdriver or a drill, ensure you have the appropriate screwdriver bit set that fits the screws you'll be using.
Level (Optional but Recommended): Using a level can help ensure that the door is installed straight and level, preventing any potential issues with its operation.
Safety Equipment: It's always a good idea to wear safety goggles and gloves when working with tools to protect your eyes and hands from any potential hazards.
Step-by-Step Installation Guide

Let's delve into a comprehensive step-by-step installation guide for bathroom door hinges:
Step 1: Measure and Mark
Using a measuring tape, determine the appropriate placement for the hinges on both the door and the door frame. Typically, hinges are installed about 7 inches from the top and bottom edges of the door.
Use a pencil to mark the locations where the hinges will be installed on both the door and the frame. If you're using butt hinges, also mark the outline of the mortises on the door and frame.
Step 2: Mortise (If Using Butt Hinges)
If you're installing butt hinges, use a chisel to carefully carve out the mortises on both the door and the frame according to the markings made in the previous step. Take your time to ensure the mortises are deep enough to accommodate the hinges snugly.
Step 3: Attach Hinges to the Door
Hold the hinge against the edge of the door at the marked location. If you're using butt hinges, align the hinge with the mortise.
Using screws and a screwdriver (or an electric screwdriver), secure the hinge to the door. Start by inserting and tightening one screw partially, then move to the opposite screw, and finally, tighten all screws fully.
Step 4: Attach Hinges to the Frame
With the door laid flat on its side, position it in the doorway, aligning the hinges on the door with the corresponding marks on the frame.
Mark the locations for the hinges on the frame using a pencil.
Attach the hinges to the frame using screws, following the same process as described in Step 3.
Step 5: Test the Door
Once the hinges are securely attached to both the door and the frame, gently swing the door open and closed to ensure it operates smoothly.
If the door doesn't swing smoothly or sits unevenly, you may need to make minor adjustments to the hinge placement or tighten the screws further.
Step 6: Install Pivot Hinges (If Using)
If you're installing pivot hinges instead of butt hinges, simply align the hinges with the top and bottom edges of the door and frame, respectively.
Secure the pivot hinges to the door and frame using screws, ensuring they are aligned properly for smooth operation.
Step 7: Adjustments and Final Touches
Double-check all screws to ensure they are tightened securely. Loose screws can cause the door to sag or malfunction over time.
If necessary, make any final adjustments to the hinge placement or door alignment to ensure everything is level and operates smoothly.
Once you're satisfied with the installation, admire your handiwork and enjoy your newly installed bathroom door hinges!
Additional Tips for a Smooth Installation
Here are some additional tips to ensure a smooth installation of bathroom door hinges:
Pre-Drill Screw Holes: Before attaching the hinges with screws, consider pre-drilling pilot holes. This helps prevent wood from splitting, especially if you're working with hardwood or dense materials.
Use Lubricant: If the hinges feel stiff or squeaky when opening and closing the door, apply a small amount of lubricant, such as WD-40, to the hinge pins. This will help improve the door's operation and extend the life of the hinges.
Check Alignment: After attaching the hinges to both the door and frame, use a level to ensure the door is properly aligned. If the door is not hanging straight, adjust the hinge placement or shim the hinges as needed to correct any misalignment.
Test Functionality: Before finishing up the installation, thoroughly test the door to ensure it opens and closes smoothly without any sticking or rubbing against the frame. Make any necessary adjustments to the hinges or door alignment to address any issues.
Secure Loose Screws: Periodically check the screws on the hinges to ensure they remain tight. If you notice any screws coming loose over time, tighten them immediately to prevent further issues with the door's operation.
Consider Self-Closing Hinges: For added convenience and functionality, consider installing self-closing hinges. These hinges automatically close the door after it has been opened, which can be particularly useful in busy households or commercial settings.
Paint or Finish Before Installation: If you plan to paint or finish the door, consider doing so before installing the hinges. This will allow you to cover the entire surface of the door, including the areas under the hinges, for a more professional-looking finish.

Safety First: Always prioritize safety when working with tools and materials. Wear appropriate safety gear, such as safety goggles and gloves, to protect yourself from potential injuries while installing the door hinges.
Take Your Time: Rushing through the installation process can lead to mistakes or uneven results. Take your time to measure accurately, align the hinges properly, and make any necessary adjustments for a professional-quality installation.
Conclusion
Installing bathroom door hinges may seem intimidating at first, but with the right tools, techniques, and a little patience, it can be a straightforward DIY project. By following the steps outlined in this guide and incorporating the handy tips provided, you can easily install door hinges and give your bathroom a stylish and functional upgrade. So, roll up your sleeves, gather your tools, and get ready to tackle this project with confidence!


